How to debug Ant Ivy project in Eclipse IDE
In this tutorial, we will show you how to debug an Ant-Ivy web project in Eclipse IDE.
Technologies used :
- Eclipse 4.2
- Eclipse Tomcat Plugin
- Ant 1.9.4
- Apache IvyDE
- Spring 4.1.3.RELEASE
Previous Ant Spring MVC web project will be reused.
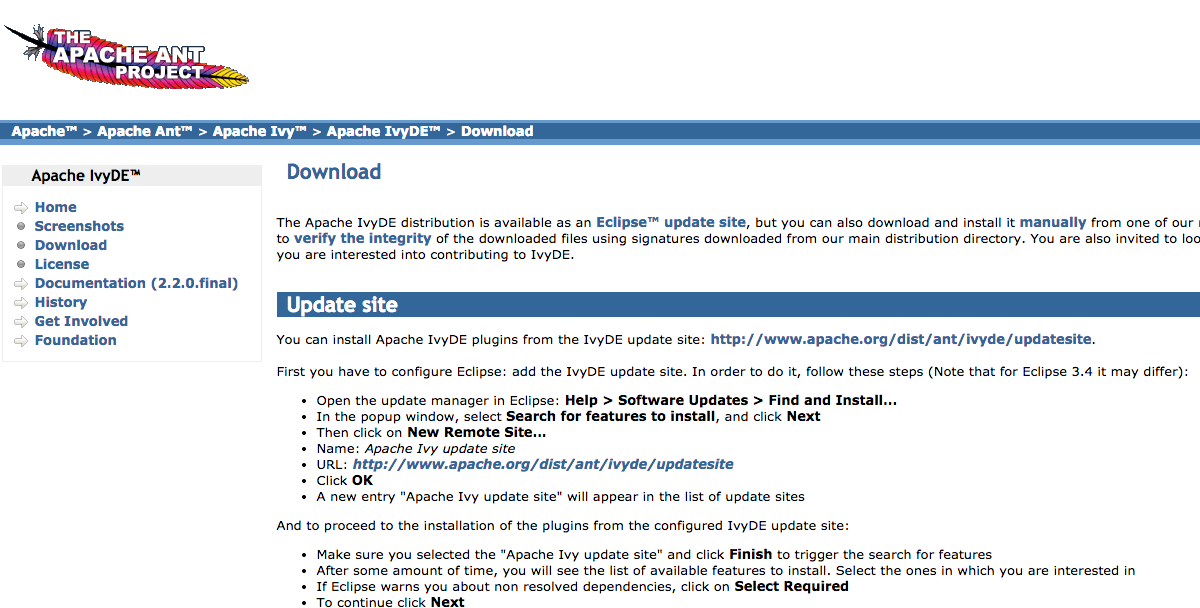
1. Install Apache IvyDE
Install Apache IvyDE, it integrates Ivy into Eclipse IDE. Restart Eclipse to finish the installation.
2. Add Ivy support to Project
Imports previous Ant Spring MVC project into Eclipse IDE as Java project (we will convert it later).
There are some error icons on Java source, ignore it, the error will be gone after integrated with Ivy dependency management.
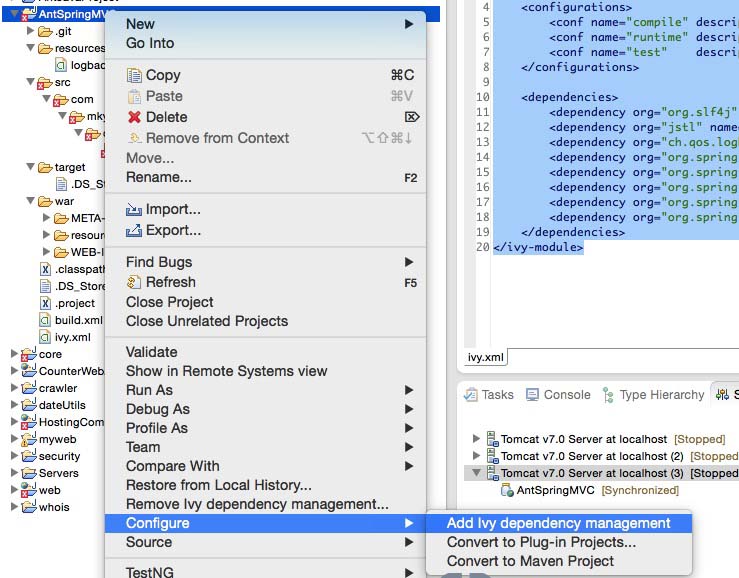
2.1 Right clicks on the project folder, select “configuration -> Add Ivy Dependency Management”
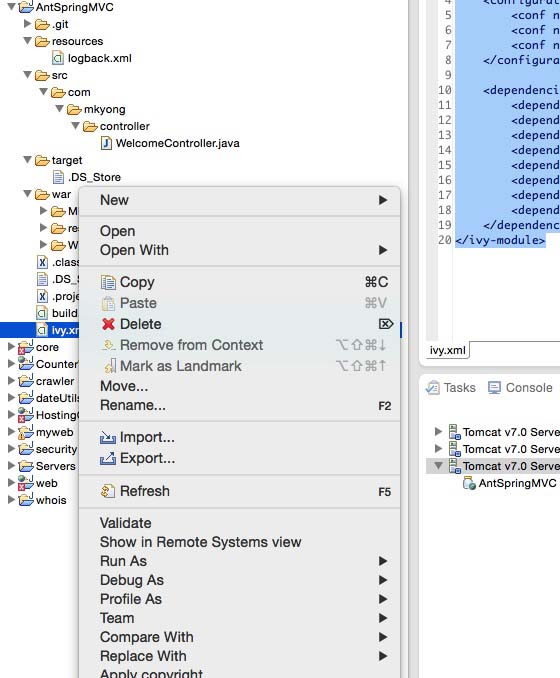
2.2 Right clicks on either ivy.xml or build.xml, choose “Add Ivy Library…”, a Ivy dialog box will be prompted, clicks on the finish button to accept the default settings.
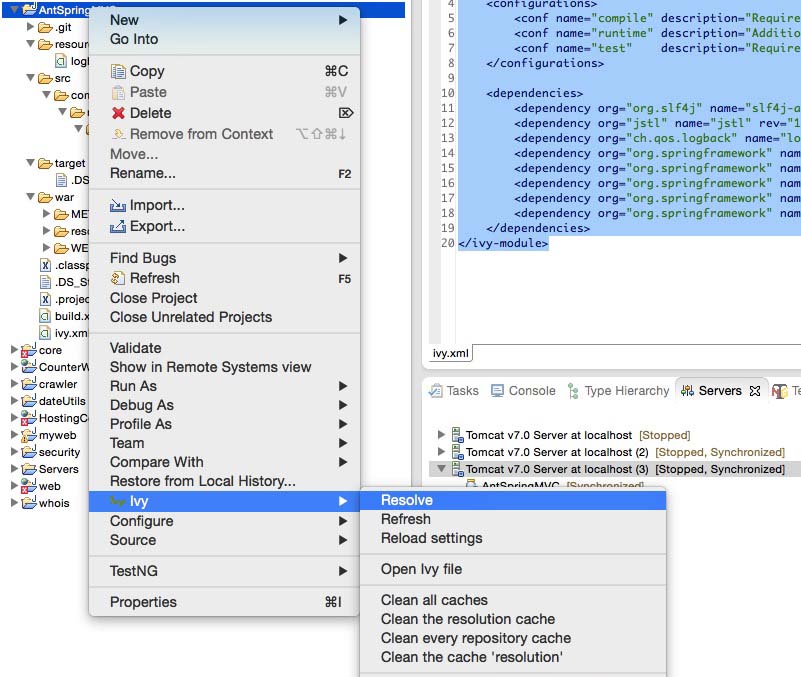
2.3 Right clicks on the project folder again, Select “Ivy”, many options are available now.
3. Convert to Eclipse Web Project
To convert the imported Java project to web project (WTP) in Eclipse :
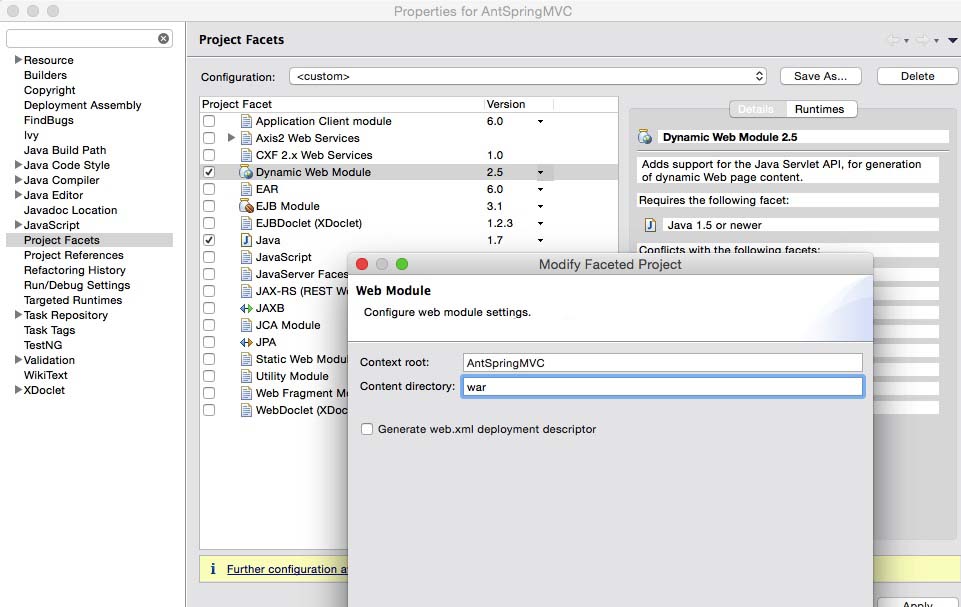
3.1 Right clicks on the project, select “properties -> Project Facets” :
Check Java, select 1.7, check Dynamic Web Module, select 2.5, clicks on the “Further configuration available”, clicks “next” to accept the default for Java application,

Update “Content directory” to war folder (The folder which contains the WEB-INF folder), unchecked the generate web.xml option.
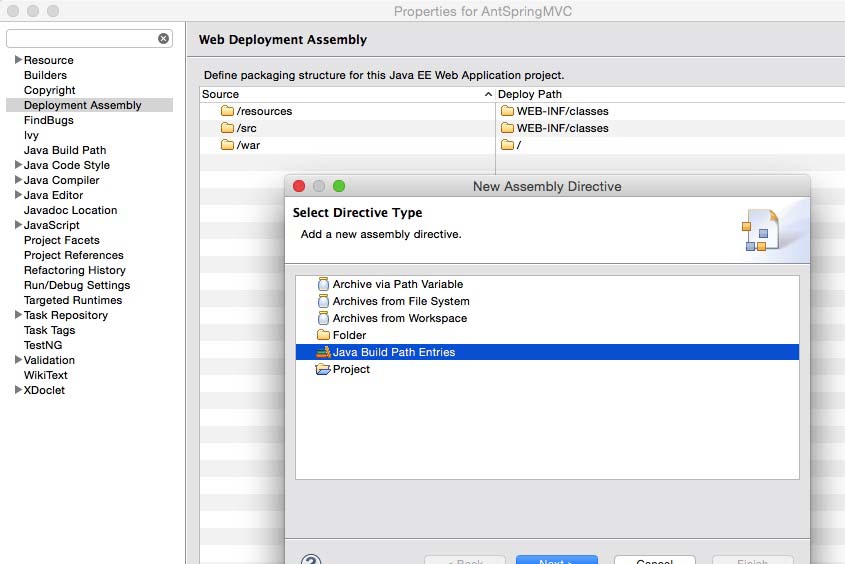
3.2 On project properties, select “Deployment Assembly”, clicks on the “Add…” button. Select “Java Build Path Entries -> Ivy”.
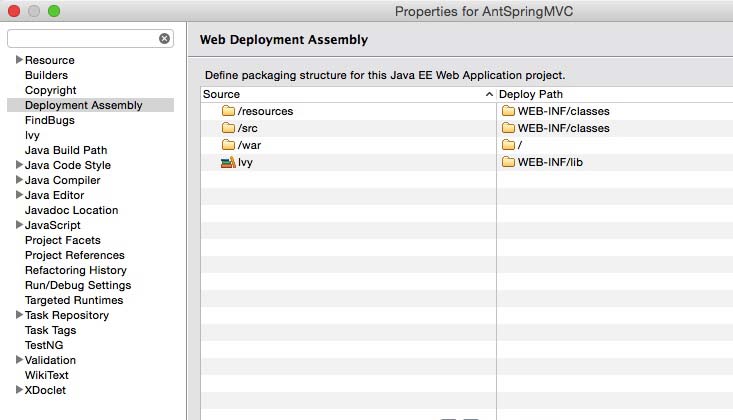
Make sure the folders are corrected, and Ivy libraries are added.
4. Debug It
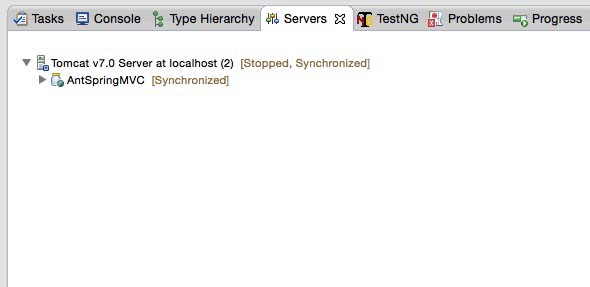
Above project is integrated with Eclipse, just debug the project as usual. In Server view, just create a Tomcat server and attaches the web project.
Done.
References
From:一号门

COMMENTS