How to change Eclipse theme
In this tutorial, we will show you how to change the Eclipse Theme.
Tools used :
- Eclipse 4.4 Luna, works on earlier version.
- Eclipse Color Theme Plugin
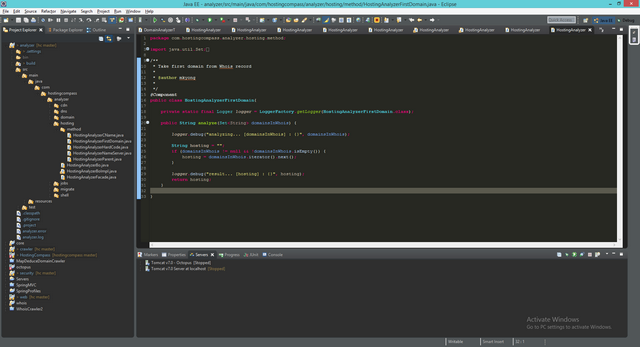
Figure : This is how your final Eclipse IDE looks like
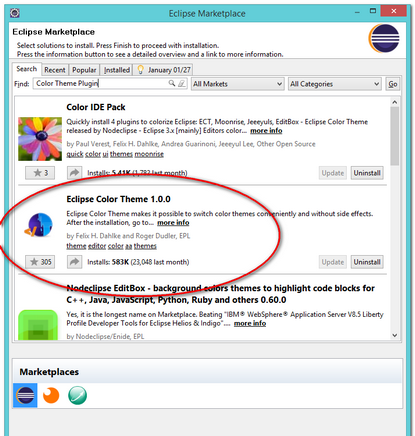
1. Install Eclipse Color Theme Plugin
Install the theme plugin and restart Eclipse.
Eclipse menu -> Help -> Eclipse Marketplace, search "Eclipse Color Theme Plugin"
2. Change the Theme
2.1 Go “Windows Preferences”, select the “Dark” theme. This will change everything to “Dark”, but the editor still remains in “white” or classic theme.
Eclipse menu -> Window -> Preference -> General -> Appearance
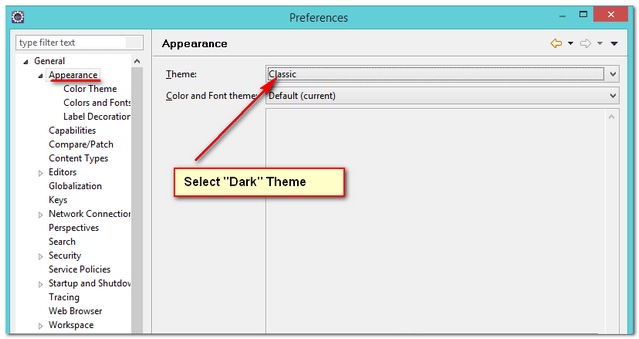
P.S This is the Eclipse feature, not the “Eclipse Color Theme Plugin”.
2.2 To change the editor theme, go
Eclipse menu -> Window -> Preference -> General -> Appearance -> Color Theme
P.S This is the feature of “Eclipse Color Theme Plugin”

In this example, we choose “sublime Text 2”. Done, you just change everything to “Dark”.
3. More Eclipse Themes
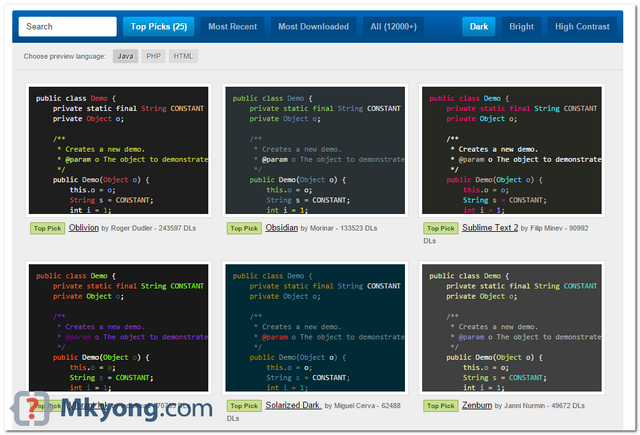
3.1 More Eclipse themes are available at http://eclipsecolorthemes.org/
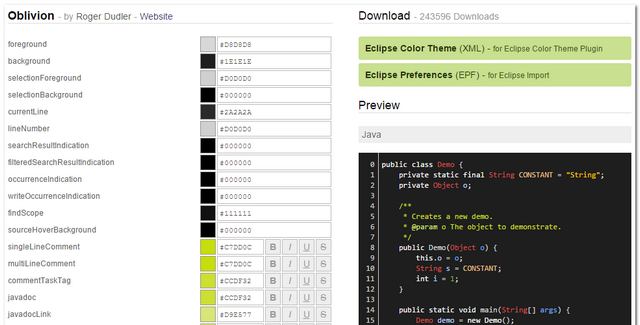
3.2 Eclipse color theme (XML)
Select the theme you want, download the “XML file” and imports it via the “Eclipse Color Theme Plugin”.

3.3 Eclipse Preferences (EPF)
If you don’t want to install the “Eclipse Color Theme Plugin”, then download the “EPF file”, and import as a preference.
Eclipse menu -> File -> Import... -> General -> Preferences

3.3.1 To uninstall an imported EPF file, restore defaults to both “General Editor” and “Java editor”.
Eclipse menu -> Window -> Preference -> General -> Editors -> "Restore Defaults"
Eclipse menu -> Window -> Preference -> Java -> Editor -> Syntax Coloring -> "Restore Defaults"
There are many similar Eclipse theme plugins, do share me your favorites :)
References
From:一号门

COMMENTS