
安装IBM FileNet 系列(1)
IBM的FileNet 好安装吗?我告诉你,现在比较好安装,如果在 4.0时代,比较难,后来的 4.5 版本后都比较好安装。我第一次安装的时候,对着 ibm 官网下载的PDF 文档,搞了两个星期才把所有的PE,CE,AE 装好。IBM 的PDF说明文档不会很详细告诉你怎么装的,因为IBM靠这个吃饭。故意把文档写得模拟两颗,让你是是而非,不好装,然后他好收取服务费。而且IBM FileNet 的安装费用很高的。
打算把安装Filenet的一个过程,记录下来,在internet上很少有这方面的资料。因此把在windows下安装的过程以截图的方式展示出来,有可能不是很全,但我确实安装通过,细心点按照我的步骤,应该没问题。
/* 本系列文章版权所有,若要转载,必须注明出处. */
Installation Guide for CE/PE server on Windows
/*以下是目录*/
Install P8 4.6 CE Server
Step 1. Install Basic software
Step 2. Install WAS 7007
Step 3. Install DB2 and Create database
Step4. Install CE Server
Step5. Config CE Servere
5.1 New Profile
5.2 Run Task 1:
5.2.1 WAS Console
5.2.2 Run task1
5.2.3 Test Connection On WAS Console
5.3 Run Task2:
5.4 Run Task3:
5.5 Task 4: Config LDAP
5.6 Install PE Client at CE server
5.7 Run Task5:Configure Bootstrap Properties
5.8 Run Task6: Deploy Application
Step 6. Validation
Step 7. Configure Domain
Step 8. Create Object Store ADOS
Step 9. Create Object Store ATOS
Install PE Server
Step1. Install PE
Step2. Install CE client
Step3. Modify the path for db2 jar
Step 4. Configure PE
Step 5. Validation
/*目录完毕*/
/*正文开始*/
安装的介质放在 9.181.141.168 这台机器上.
Install P8 4.6 CE Server Step 1. Install Basic software Download: 9.181.141.168\c$\Inatallers administrator/Passw0rd
Note: Do not install WSE 3.0 on Windows 2008 .
Step 2. Install WAS 7007 Download: 9.181.141.168\c$\Inatallers administrator/Passw0rd
Tips: Select Application Server during the installation. Configure LDAP on WAS console:
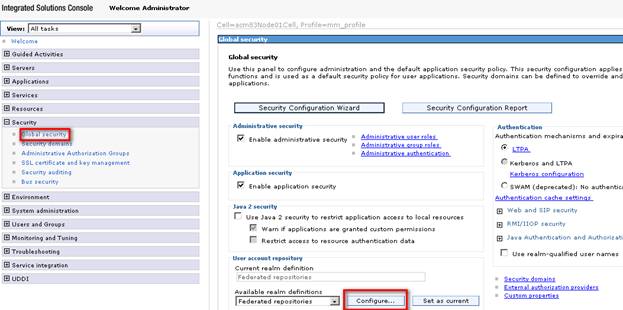
2.1 Start WAS . Log in WAS console, navigate to Global Security Page, and then click Configure on the page.
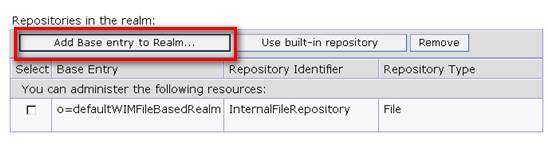
2.2 Click button Add Base entry to Realm…
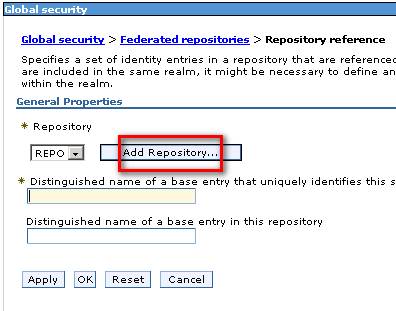
2.3 Click button Add Repository…
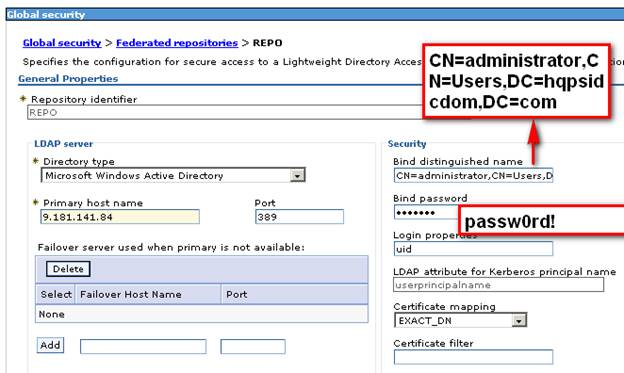
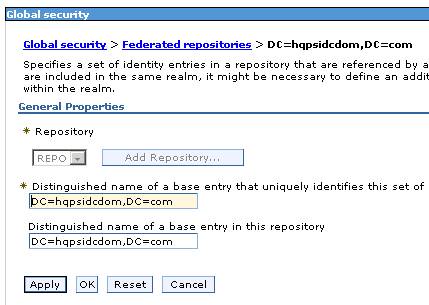
2.4 Save your changes to the master configuration.
2.5 Restart WAS , and log in the WAS console again to test whether you can log in the WAS console with the new password. Administrator/passw0rd! Step
3. Install DB2 and Create database
Download: 9.181.141.168\c$\Inatallers administrator/Passw0rd
1. Install DB2 V9.7. Remember the user name and password.
2. Copy sql script to your server to create database. Sql script locate s at 9.181.141.168\d$\DB2Scripts.168
3. Create GCD DB for CE
3.1 Modify creategcddb.bat file Here is an example if you want to create the database at C:\DB2
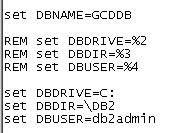
3.2 Run creategcddb.bat at command window. 4. Create ADOS DB for Object Store ADOS Here is an example if you want to create the database at D:\DB2
![]()
5. Create ATOS DB for Object Store ATOS and PE Here is an example if you want to create the database at D:\DB2
![]()
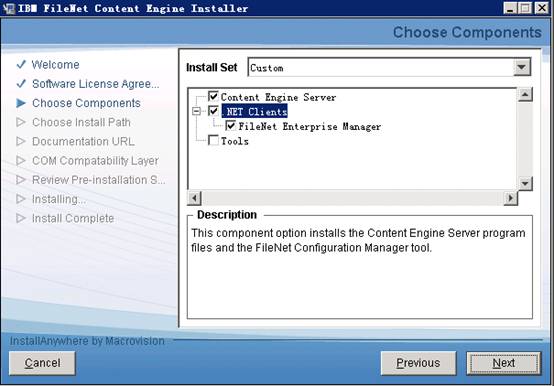
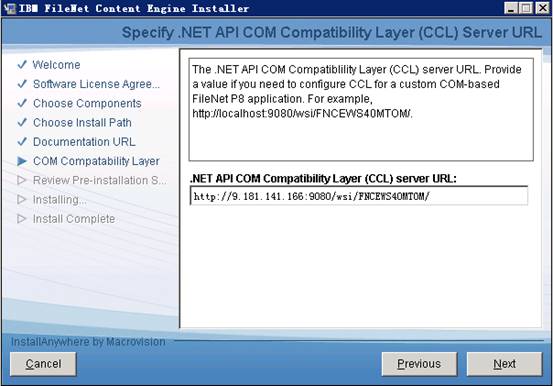
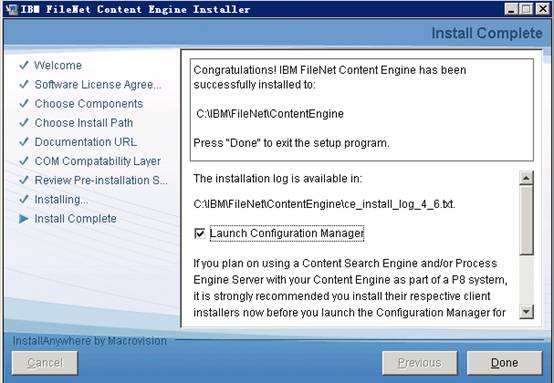
Step4. Install CE Server 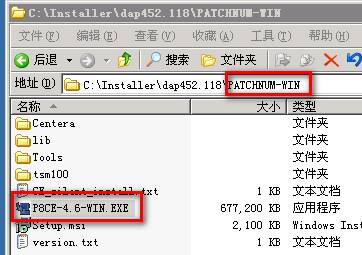
本文待续 持续更新中 ........
From:一号门
Previous:告别 FILNET 重磅炸弹
COMMENTS